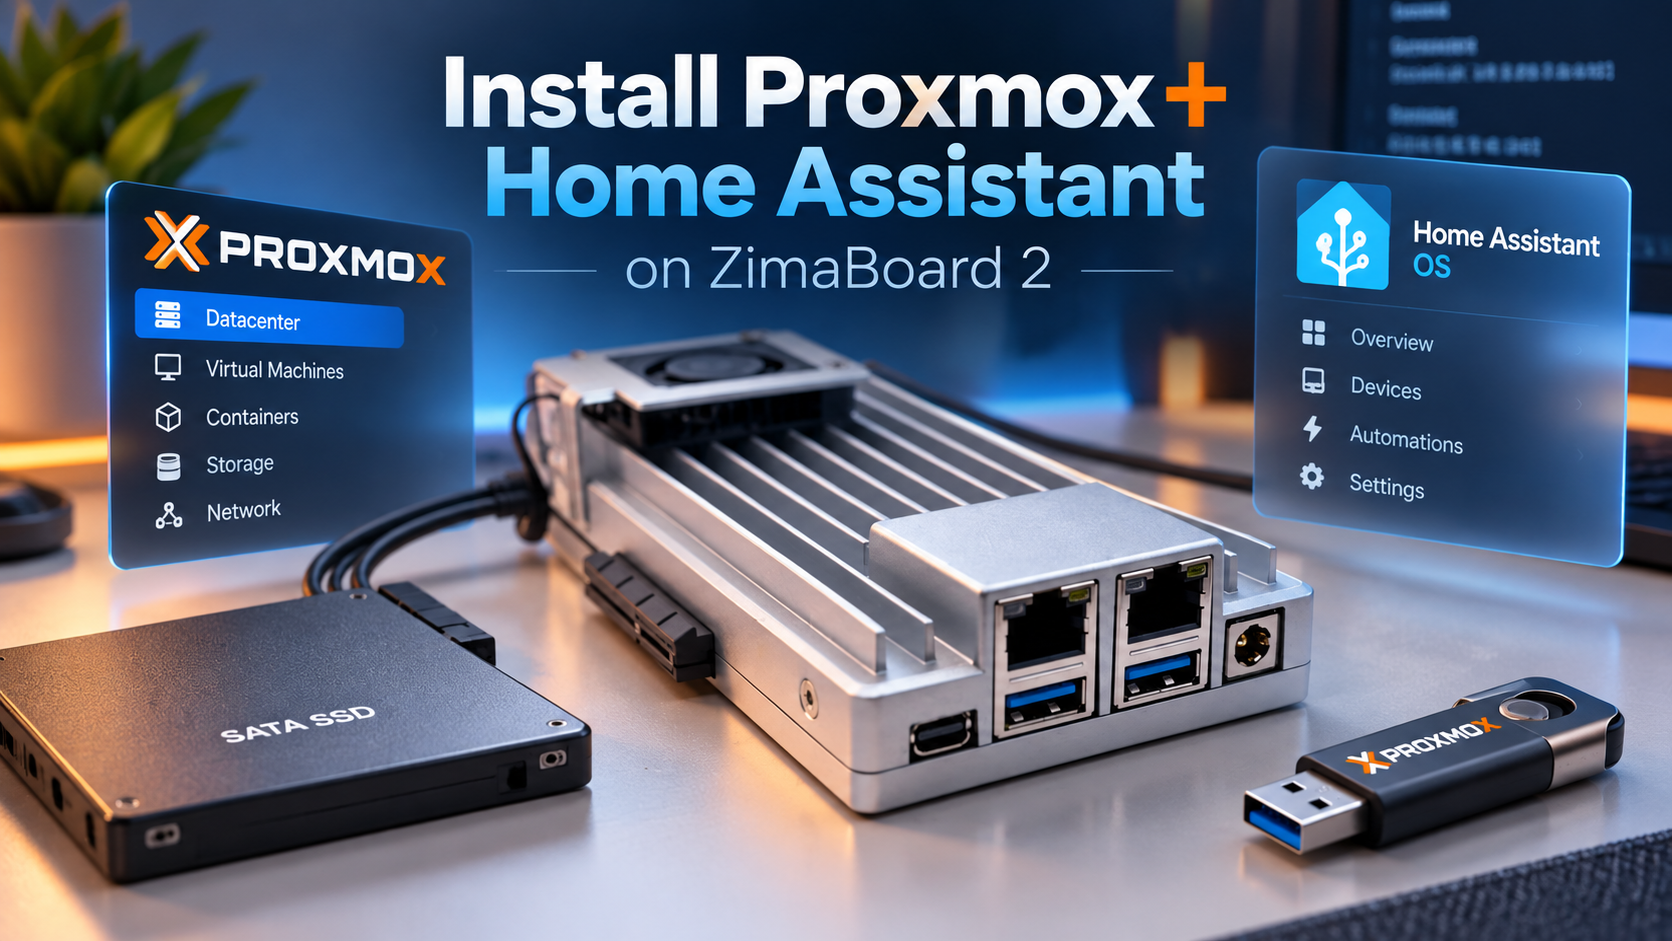
Not only do you get the full Home Assistant experience, including support for apps, backups and updates, but you can also run other virtual machines and services alongside it, all on the same physical computer.
In my ZimaBoard 2 review, I actually took the SSD out of my existing home server, connected it to the ZimaBoard 2, and managed to get my entire Proxmox setup running on it.
And despite the ZimaBoard having just 8GB of RAM, compared with the 16GB in my previous Intel i7 mini PC, it did a surprisingly good job.
In this guide, I'll show you how to start from scratch, installing an SSD onto the ZimaBoard 2, configuring it to boot from that SSD, installing Proxmox, and finally creating a full Home Assistant OS virtual machine.
But first, it's worth making sure you're starting with the right hardware.
Before spending money on something like the ZimaBoard 2, I'd strongly recommend giving some thought to what you actually want your home server to do.
If you're only planning to run Home Assistant, you really don't need an especially powerful computer.
In fact, you can often pick up a perfectly capable second-hand mini PC on eBay for surprisingly little money.
Something with an Intel N100 processor, or even an older Intel Core i5, can make an excellent starting point.
And because Proxmox allows you to run multiple virtual machines and containers, you're not limited to just Home Assistant.
You might eventually decide to run things like:
Home Assistant OS for your smart home.
AdGuard Home for network-wide ad blocking.
Scrypted or Frigate for security cameras.
Plex or Jellyfin for streaming media.
MQTT brokers, databases or other self-hosted services.
Local voice recognition and AI tools.
Some of these need considerably more processing power, RAM or storage than others.
For a basic Home Assistant setup, 8GB of system RAM is perfectly reasonable, but if you're planning to expand your homelab over time, I'd recommend looking for something with at least 16GB, or ideally the ability to upgrade it later.
Likewise, I'd suggest a minimum 128GB SSD for a modest installation, but 256GB or 500GB will give you more room to experiment. Camera recordings and media libraries will usually need considerably more storage, ideally on separate drives.
Make sure the computer supports hardware virtualisation (Intel VT-x or AMD-V), has a reliable wired Ethernet connection, and has enough USB ports for any Zigbee, Thread or Z-Wave adapters you're planning to use.
The ZimaBoard 2 is an interesting option because it offers several features that you wouldn't necessarily find on a typical mini PC.
It has an Intel N150 quad-core processor, dual 2.5Gb Ethernet, two powered SATA connections, PCIe 3.0 expansion and a completely fanless aluminium enclosure.
It's available with either 8GB or 16GB of RAM, although it's important to know that the RAM is soldered onto the board and cannot be upgraded.
For a larger Proxmox setup, I'd strongly consider the 16GB version.
But whichever computer you decide to use, the Proxmox and Home Assistant installation process will be broadly similar.
For the rest of this guide, I'll be concentrating on the ZimaBoard 2 specifically.
Before getting started, make sure you have:
A ZimaBoard 2 (or another compatible x86 mini PC).
A SATA SSD, preferably 128GB or larger.
The ZimaBoard's SATA data and power cable.
A USB flash drive to use as the Proxmox installer.
A USB keyboard.
A monitor with a suitable Mini DisplayPort connection or adapter.
An Ethernet connection to your home network.
Another computer to prepare the installation USB drive.
It's worth mentioning that the ZimaBoard 2 already has built-in eMMC storage containing ZimaOS.
However, for this installation, we're going to leave that storage alone and install Proxmox onto a separate SSD instead.
This gives us more room for virtual machines and leaves the existing ZimaOS installation available should we ever want to return to it.
Important: Installing Proxmox will erase the contents of whichever drive you select during installation. Make sure you've backed up anything important before continuing.
One of the nice things about the ZimaBoard 2 is that it has two native SATA connections, complete with power for the drives.
That means you don't need an external USB enclosure or a separate SATA power adapter to connect a compatible SSD.
Disconnect the power supply from your ZimaBoard 2.
Locate the SATA connections on the board.
Connect the supplied SATA data and power cable to one of those connections.
Connect the other end to your SATA SSD.
Make sure both connections are secure.
Position or mount the SSD somewhere suitable (the starter bundle/NAS kit both give you somewhere to mount a drive properly)
And that's really all there is to the physical installation.
You can use the ZimaBoard 2's second SATA connection for another drive later if you want to expand your storage.
If you're using a different mini PC, you may need to open its case to install an internal SSD instead.
For this guide, we're using a 2.5-inch SATA SSD. The ZimaBoard's PCIe expansion slot also provides other storage possibilities, but those aren't covered here.
Next, we need to prepare a USB drive containing the Proxmox installer.
Proxmox VE is a free, open-source virtualisation platform, allowing you to run multiple operating systems on one physical computer.
You can think of it as the software which will manage all the virtual machines running on your new server.
Head to the official Proxmox website and download the latest appropriate x86-64 Proxmox VE ISO installer.
Make sure you're downloading Proxmox Virtual Environment (VE), rather than Proxmox Backup Server or another product.
Once downloaded, you'll need to write the ISO file onto your USB flash drive.
You can't simply copy the ISO file onto the USB drive as you would with an ordinary document. It needs to be written as a bootable image.
There are several tools capable of doing this.
One of the easiest is balenaEtcher, which works on Windows, macOS and Linux.
Open balenaEtcher.
Select the Proxmox ISO file you downloaded.
Select your USB flash drive.
Click Flash and wait for the process to finish.
Be aware that this will erase the contents of your USB drive.
If you're using Windows, Rufus is another option, but make sure you select DD mode when prompted.
Proxmox also provides detailed instructions for preparing installation media using different operating systems.
Official Proxmox USB Installation Guide
Once the process is complete, safely eject your USB drive.
Now it's time to connect everything to your ZimaBoard 2.
With the SSD already connected:
Plug in your newly created Proxmox installation USB.
Connect a USB keyboard.
Connect your monitor using Mini DisplayPort.
Connect an Ethernet cable to your network.
Connect the ZimaBoard's power supply.
The ZimaBoard 2 should power on automatically.
However, because it normally boots into ZimaOS from its internal eMMC storage, we'll need to tell it to boot from the USB drive instead.
As soon as you power on the ZimaBoard 2, repeatedly press the Esc key to enter the BIOS.
On some firmware versions or other computers, Delete, or another Function key may be used instead.
Once inside the BIOS, look for the Boot settings.
Find the boot priority options and select your USB drive as the first boot device.
The USB drive may be listed by its manufacturer's name, sometimes with a UEFI prefix.
Save your changes and exit the BIOS.
The ZimaBoard should restart, this time loading the Proxmox installer from your USB drive.
If it continues to boot into ZimaOS, return to the BIOS and check that you've selected the correct boot device.
Once you've successfully booted from USB, you should see the Proxmox installer menu.
Choose the graphical installation option and proceed through the installer.
You'll be asked to accept the licence agreement before choosing where to install Proxmox.
This is probably the most important part of the process.
The ZimaBoard 2 has its own built-in eMMC storage, but we want to install Proxmox onto the SATA SSD we connected earlier.
When asked to select the target disk, choose your SSD.
You should be able to identify it by its manufacturer, model or storage capacity.
Be VERY careful here. Selecting the wrong disk could erase your existing ZimaOS installation or any other data stored on the machine.
For a straightforward installation onto a single SSD, the default filesystem and disk layout options should be suitable for most users.
Remember, the selected SSD will be wiped during installation.
Next, you'll be asked to select your country, time zone and keyboard layout.
You'll also need to create a root password and provide an email address.
Make sure you save this password somewhere safe, as you'll need it to access the Proxmox management interface.
Proxmox is designed to be managed through a web browser on another computer, so it needs a reliable network connection.
During installation, you'll be asked to configure the management network interface, IP address, gateway and DNS server.
If you're using the ZimaBoard 2, remember that it has two Ethernet ports, so make sure you've selected the one that's actually connected to your network.
I'd strongly recommend giving your Proxmox server a fixed IP address.
For example, if your home network uses the 192.168.1.x range, you might choose:
IP address: 192.168.1.50
Gateway: 192.168.1.1
DNS server: 192.168.1.1
Hostname: pve.home.arpa
These are just examples. You'll need to use values appropriate to your own network, and make sure the IP address you choose isn't already in use or going to be assigned to something else by your router.
Once everything is configured, review the installation summary and begin installing Proxmox.
The installation should only take a few minutes.
When it's finished, remove your USB installation drive and reboot the ZimaBoard.
Now that Proxmox has been installed, we need to make sure that the ZimaBoard starts from the SSD rather than returning to ZimaOS.
This is especially important because the built-in eMMC may still be the preferred boot device.
Restart the ZimaBoard and return to the BIOS by pressing Esc during startup.
Navigate back to the Boot settings.
This time, instead of selecting the USB drive, find the boot entry corresponding to your newly installed Proxmox SSD.
Depending on your BIOS version, this may appear as the SSD's model name, a UEFI operating system entry, or a Proxmox-related boot entry.
Set that as your first boot device.
Save your changes and restart.
If everything has worked correctly, the ZimaBoard should now load Proxmox directly from the SSD.
And from this point onwards, you shouldn't need to have a monitor or keyboard attached to it for normal use.
Once Proxmox has booted, you should see a console screen displaying its management address.
It will look something like this:
https://192.168.1.50:8006
The actual IP address will depend on what you configured during installation.
On another computer connected to the same network, open that address in your web browser.
You may see a security warning because Proxmox uses a self-signed HTTPS certificate by default.
This is normal for a fresh installation. After checking that you're connecting to the correct local server, you can proceed.
You'll then be presented with the Proxmox login screen.
Log in using:
Username: root
Password: the password you created during installation.
Realm: Linux PAM standard authentication.
Once logged in, you'll have access to the main Proxmox management dashboard.
You can now create virtual machines, containers, configure storage, monitor system resources and manage everything from your web browser.
And the nice thing is that Proxmox itself is completely free to use.
You may see a message explaining that you don't have a valid subscription, but this doesn't prevent you from using it.
If you're not using a paid subscription, you should also configure the appropriate no-subscription package repositories before applying updates. You can find details in the official Proxmox documentation.
I'd recommend applying the available system updates before going any further.
Now for the part we've been working towards: installing Home Assistant.
There are several different ways to run Home Assistant, including directly on hardware, inside Docker containers, or as a virtual machine.
Personally, I much prefer running the full Home Assistant OS as a VM inside Proxmox.
This provides the complete Home Assistant experience, including its own operating system, Supervisor and app management.
And because it runs as a virtual machine, Proxmox allows you to allocate resources to it, take backups, restore previous states and run other services on the same hardware.
You could manually download the Home Assistant OS virtual disk image and create the VM yourself.
But there's a MUCH easier way.
The Proxmox community maintains an excellent collection of scripts which can automatically create and configure virtual machines and containers.
And fortunately, there's one specifically for Home Assistant OS.
Start by opening the Proxmox web interface.
Select your Proxmox server node from the left-hand panel.
Click Shell to open a terminal on the Proxmox host.
Copy and paste the following command into the terminal:
bash -c "$(curl -fsSL https://raw.githubusercontent.com/community-scripts/ProxmoxVE/main/vm/haos-vm.sh)"
Press Enter to run it.
This command downloads and executes the Home Assistant OS VM installation script maintained by the Proxmox Community Scripts project.
As with any script downloaded from the internet, it's sensible to check what you're running, especially when it requires administrator privileges.
You can find the project's documentation and source code here:
Home Assistant OS Proxmox Installation Script
The script will guide you through creating your Home Assistant virtual machine.
For most users, the default options should be absolutely fine.
At the time of writing, the default configuration includes approximately:
2 virtual CPU cores.
4GB RAM.
32GB virtual disk storage.
If you're using a machine with more RAM, or planning to run a particularly complicated Home Assistant setup, you can increase these values.
For example, my own Home Assistant installation runs various integrations and voice processing tools, so allocating additional resources can be beneficial.
However, it's important to remember that your Proxmox host also needs RAM and CPU resources, especially if you're planning to run other virtual machines alongside Home Assistant.
If you're using the 8GB ZimaBoard 2, I'd suggest starting with the defaults and adjusting them later if necessary.
The script should handle downloading the official Home Assistant OS installation image and creating the virtual machine for you.
Once the script finishes, find your newly created Home Assistant VM in the Proxmox sidebar.
Open its Console tab, and follow any remaining Home Assistant installation instructions shown there. Recent Home Assistant OS installation images may require this additional step before first boot.
After installation, allow Home Assistant a few minutes to start for the first time.
Once your Home Assistant virtual machine is running, you should be able to access it from another device on your network.
Try opening:
http://homeassistant.local:8123
Alternatively, you can access it directly using the virtual machine's IP address:
http://YOUR-HOME-ASSISTANT-IP:8123
For example:
http://192.168.1.51:8123
The IP address of your Home Assistant VM will normally be different from the IP address of your Proxmox server.
Depending on the Home Assistant OS version, the initial setup may also be available on port 80, with older port 8123 addresses redirecting automatically.
If you're unsure which address to use, check the information displayed in the Home Assistant VM console.
When you reach the Home Assistant welcome screen, you can follow the instructions to create your account and configure your new smart home.
Or, if you're migrating from an existing Home Assistant installation, you should be able to restore a compatible Home Assistant backup during the initial setup.
This is particularly useful if you're moving from a Raspberry Pi or another Home Assistant OS device.
And that's it!
You now have a complete Home Assistant OS installation running as a virtual machine inside Proxmox, booting directly from your ZimaBoard 2's SSD.
Before you start relying on your new server for your entire smart home, there are a few additional settings worth checking.
In Proxmox, select your Home Assistant virtual machine, then open Options.
Find the Start at boot setting and enable it.
That way, if your ZimaBoard restarts following a power cut or system update, Proxmox will automatically start Home Assistant again.
If you're using USB radio adapters, you'll need to make them available to your Home Assistant virtual machine.
This is straightforward in Proxmox.
Shut down your Home Assistant VM, select it in the sidebar, and open Hardware.
Click Add, followed by USB Device.
Choose the appropriate USB adapter from the available devices, then start the VM again.
Home Assistant should now be able to communicate with the adapter directly.
For USB devices, I recommend using stable device identifiers wherever possible, as Linux device addresses can sometimes change following a reboot.
One of the biggest benefits of using Proxmox is the ability to back up entire virtual machines.
However, I'd recommend using BOTH Proxmox backups and Home Assistant's own backup system.
Ideally, those backups should be stored somewhere other than the SSD your server is running from.
There's not much point keeping your only backup on the same drive that might eventually fail!
This is something I discovered during my own testing.
When I moved my existing Proxmox SSD from an Intel i7 mini PC to the ZimaBoard 2, my Home Assistant VM initially had some fairly serious performance issues with local Whisper voice transcription.
After getting Proxmox to re-evaluate the CPU features available to the VM, performance improved considerably.
I also changed to a smaller Whisper model during testing, so that contributed to the improvement.
If you're running CPU-intensive services such as local voice recognition, I'd recommend checking the processor configuration under your Home Assistant VM's Hardware settings.
Using the host CPU type allows a VM to take advantage of more of the physical processor's capabilities, although it can make moving that VM between different computer architectures less straightforward.
For most Home Assistant installations, you probably won't need to change anything here, but it's worth knowing about if performance isn't what you'd expect.
Of course, now that you've got Proxmox installed, there's no reason to stop at Home Assistant.
One of the biggest advantages of this setup is that you can add other virtual machines or Linux containers without needing to purchase another physical computer.
For example, you could install AdGuard Home to block advertisements and trackers across your network.
Or run a dedicated MQTT broker, Plex server, Scrypted for your cameras, or any number of other services.
The Proxmox Community Scripts website contains a huge collection of installation scripts for popular self-hosted software.
Just remember to keep an eye on your CPU, RAM and storage usage as you add more services.
And if you eventually outgrow your ZimaBoard 2, Proxmox makes it relatively straightforward to move your virtual machines onto more powerful hardware.
I've been running Home Assistant inside Proxmox for quite some time now, and it's a setup I'd happily recommend to anyone looking to build a more flexible and expandable smart home server.
The ZimaBoard 2 makes a particularly interesting host thanks to its compact size, low power requirements and excellent connectivity.
But the same principles apply whether you're using one of these, a second-hand mini PC from eBay, or a much more powerful home server.
Start with hardware that's appropriate for what you want to achieve, give yourself a little room to expand, and you'll end up with a system that can grow alongside your smart home.
And if you'd like to see how the ZimaBoard 2 performed when I moved my entire existing Home Assistant and Proxmox setup onto it, be sure to check out my full video review.
Useful links:
Some product links in this article are affiliate links. If you purchase through them, I may earn a small commission at no extra cost to you. Thanks for supporting the website and channel!
© 2026 Home Is Where The Smart Is. All rights reserved.